在C#开发过程中,Debug和Release这两种构建模式对每位开发者来说都至关重要。无论您是初学者还是经验丰富的开发人员,深入理解这两种模式的区别和应用场景,都能显著提高您的开发效率和应用质量。本文将通过大量实例和详细解析,带您全面了解C#中的Debug与Release构建模式。
Debug构建模式:开发者的好帮手 Debug模式的核心特点 Debug模式(调试模式)主要在开发阶段使用,具有以下关键特性:
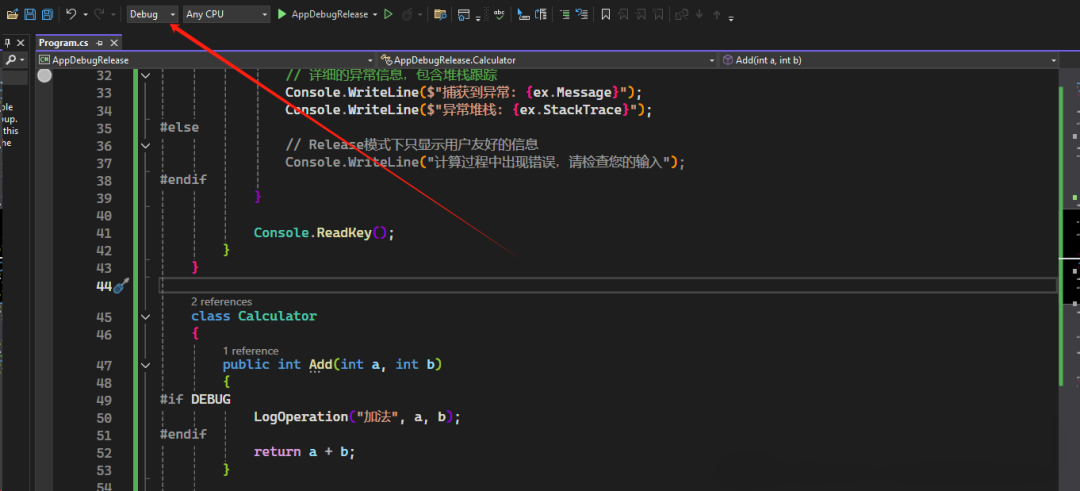
携带丰富的调试信息 :编译器会保留变量名、行号等信息,方便开发者追踪程序执行过程 优化级别低 生成文件体积较大 运行速度相对较慢 条件编译指令实战 在Debug模式下,我们可以利用 #if DEBUG 条件编译指令添加仅在调试环境中执行的代码:
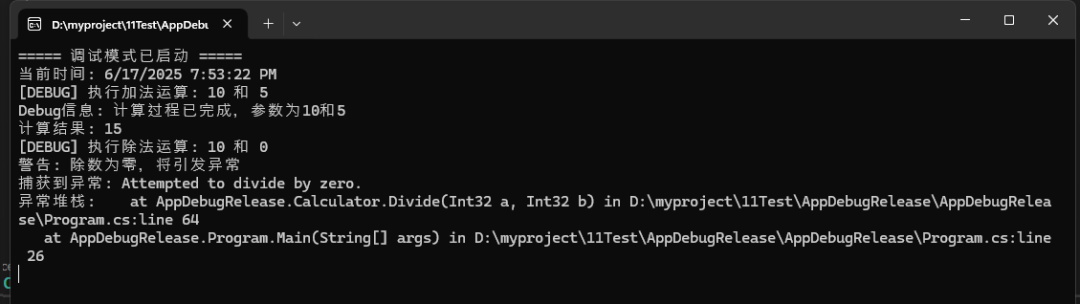
using System; using System.Diagnostics; namespace DebugDemoApp { class Program { static void Main ( string [] args) { // 仅在Debug模式下显示的信息 # if DEBUG Console.WriteLine( "===== 调试模式已启动 =====" ); Console.WriteLine($ "当前时间: {DateTime.Now}" ); # endif // 业务逻辑代码 Calculator calculator = new Calculator(); int result = calculator.Add( 10 , 5 ); # if DEBUG Console.WriteLine($ "Debug信息: 计算过程已完成,参数为10和5" ); # endif Console.WriteLine($ "计算结果: {result}" ); // 模拟潜在错误情况 try { int divideResult = calculator.Divide( 10 , 0 ); Console.WriteLine($ "除法结果: {divideResult}" ); } catch (DivideByZeroException ex) { # if DEBUG // 详细的异常信息,包含堆栈跟踪 Console.WriteLine($ "捕获到异常: {ex.Message}" ); Console.WriteLine($ "异常堆栈: {ex.StackTrace}" ); # else // Release模式下只显示用户友好的信息 Console.WriteLine( "计算过程中出现错误,请检查您的输入" ); # endif } Console.ReadKey(); } } class Calculator { public int Add ( int a, int b) { # if DEBUG LogOperation( "加法" , a, b); # endif return a + b; } public int Divide ( int a, int b) { # if DEBUG LogOperation( "除法" , a, b); if (b == 0 ) { Console.WriteLine( "警告: 除数为零,将引发异常" ); } # endif return a / b; } # if DEBUG // 此方法仅在Debug模式下编译 private void LogOperation ( string operationType, int a, int b) { Console.WriteLine($ "[DEBUG] 执行{operationType}运算: {a} 和 {b}" ); } # endif } }
代码说明:
使用 #if DEBUG 块包裹调试专用代码,这些代码仅在Debug构建时被编译和执行 在异常处理中,Debug模式提供详细信息,而Release模式则给出简洁的用户提示 通过条件编译定义了仅在Debug模式下存在的日志方法 使用Conditional特性实现条件方法 除了条件编译指令,C#还提供了更优雅的 [Conditional] 特性,用于定义仅在特定构建模式下调用的方法:
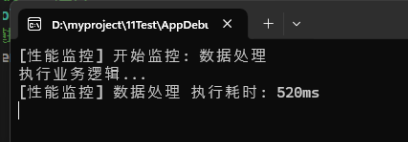
using System; using System.Diagnostics; namespace ConditionalAttributeDemo { class PerformanceMonitor { private Stopwatch stopwatch = new Stopwatch(); // 此方法仅在DEBUG符号定义时被调用 [Conditional( "DEBUG" )] public void StartMonitoring ( string operationName) { Console.WriteLine($ "[性能监控] 开始监控: {operationName}" ); stopwatch.Restart(); } // 此方法仅在DEBUG符号定义时被调用 [Conditional( "DEBUG" )] public void StopAndReport ( string operationName) { stopwatch.Stop(); Console.WriteLine($ "[性能监控] {operationName} 执行耗时: {stopwatch.ElapsedMilliseconds}ms" ); } // 此方法在所有构建模式下都会被调用 public void DoRealWork () { // 实际业务逻辑 Console.WriteLine( "执行业务逻辑..." ); // 模拟耗时操作 System.Threading.Thread.Sleep( 500 ); } } class Program { static void Main ( string [] args) { PerformanceMonitor monitor = new PerformanceMonitor(); // 调用性能监控方法 - 在Release模式下这些调用会被忽略 monitor.StartMonitoring( "数据处理" ); // 实际业务逻辑 monitor.DoRealWork(); // 报告性能结果 - 在Release模式下这些调用会被忽略 monitor.StopAndReport( "数据处理" ); Console.ReadKey(); } } }
代码说明:
[Conditional("DEBUG")] 在Release模式下,这些方法的调用会被编译器自动移除,不会产生任何运行时开销 这种方式特别适合实现性能监控、日志记录等调试辅助功能 Debug模式下的断言功能 C#提供了强大的断言功能,帮助开发者验证代码假设,这在Debug模式下特别有用:
using System; using System.Diagnostics; namespace AssertionDemo { class BankAccount { private decimal balance; private readonly string accountId; public BankAccount ( string id, decimal initialBalance) { // 验证参数有效性 Debug.Assert(! string .IsNullOrEmpty(id), "账户ID不能为空" ); Debug.Assert(initialBalance >= 0 , "初始余额不能为负数" ); accountId = id; balance = initialBalance; } public void Deposit (decimal amount) { // 验证存款金额合理性 Debug.Assert(amount > 0 , "存款金额必须大于零" ); balance += amount; // 验证操作结果 Debug.Assert(balance >= 0 , "账户余额不应为负" ); Console.WriteLine($ "存款成功,当前余额: {balance:C}" ); } public bool Withdraw (decimal amount) { // 验证取款金额合理性 Debug.Assert(amount > 0 , "取款金额必须大于零" ); if (balance >= amount) { balance -= amount; Console.WriteLine($ "取款成功,当前余额: {balance:C}" ); return true ; } Console.WriteLine( "余额不足,取款失败" ); return false ; } } class Program { static void Main ( string [] args) { BankAccount account = new BankAccount( "AC12345" , 1000 ); account.Deposit( 500 ); account.Withdraw( 200 ); // 以下代码在Debug模式下会触发断言失败 // account.Deposit(-100); Console.ReadKey(); } } } 代码说明:
Debug.Assert() 断言帮助开发者在问题发生的地方立即捕获和识别它 断言代码仅在Debug模式下生效,Release模式下被自动移除 Release构建模式:性能与效率的保证 Release模式的核心特点 Release模式(发布模式)主要用于应用程序的正式发布,具有以下特征:
激活编译优化 移除调试信息 生成文件体积较小 运行速度更快 优化示例 以下是一个展示Release优化效果的示例:
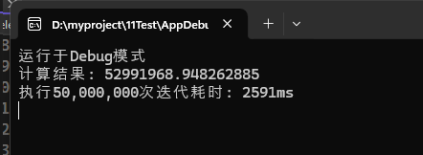
using System; using System.Diagnostics; namespace OptimizationDemo { class Program { static void Main ( string [] args) { const int iterations = 50 _000_000; Stopwatch stopwatch = new Stopwatch(); stopwatch.Start(); double result = 0 ; for ( int i = 0 ; i < iterations; i++) { result += ComplexCalculation(i); } stopwatch.Stop(); # if DEBUG Console.WriteLine( "运行于Debug模式" ); # else Console.WriteLine( "运行于Release模式" ); # endif Console.WriteLine($ "计算结果: {result}" ); Console.WriteLine($ "执行{iterations:N0}次迭代耗时: {stopwatch.ElapsedMilliseconds}ms" ); Console.ReadKey(); } static double ComplexCalculation ( int value) { // 假设这是一个计算密集型操作 // 在Release模式下,编译器可能会优化这些计算 double result = Math.Sin(value) * Math.Cos(value); result = Math.Sqrt(result * result + 1 ); return result; } } }
代码说明:
在Debug和Release模式下运行此代码会发现显著的性能差异 Release模式下,编译器可能会优化循环结构和数学运算 复杂的数学计算在Release模式下通常能获得数倍的性能提升 定义自定义编译符号 除了内置的DEBUG和RELEASE符号,我们还可以定义自己的编译符号,用于更精细的条件编译控制:
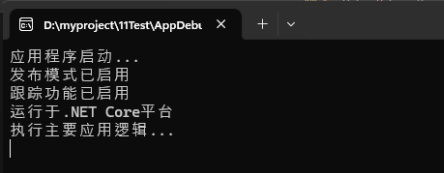
using System; namespace CustomSymbolDemo { class Program { static void Main ( string [] args) { Console.WriteLine( "应用程序启动..." ); # if DEBUG Console.WriteLine( "调试模式已启用" ); # endif # if RELEASE Console.WriteLine( "发布模式已启用" ); # endif # if TRACE Console.WriteLine( "跟踪功能已启用" ); # endif // 使用自定义编译符号 # if BETA Console.WriteLine( "测试版功能已启用" ); EnableBetaFeatures(); # endif // 根据不同的目标平台执行特定代码 # if NETCOREAPP Console.WriteLine( "运行于.NET Core平台" ); # elif NETFRAMEWORK Console.WriteLine( "运行于.NET Framework平台" ); # endif RunApplication(); Console.ReadKey(); } # if BETA private static void EnableBetaFeatures () { Console.WriteLine( "初始化测试版专属功能..." ); // 测试版特有的功能代码 } # endif private static void RunApplication () { // 应用程序的主要逻辑 Console.WriteLine( "执行主要应用逻辑..." ); } } }
代码说明:
可以在项目属性中定义自定义符号,如BETA、TEST等 利用这些符号可以实现更复杂的条件编译控制 对于多平台、多版本应用开发非常有用 实际开发中的最佳实践 日志记录与跟踪 日志记录是最常见的Debug与Release区分应用场景:
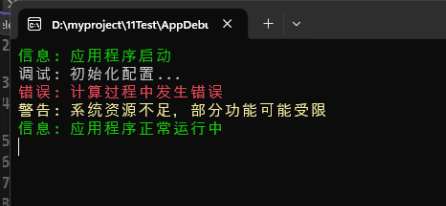
using System.Diagnostics; namespace AppDebugRelease { public static class Logger { private static readonly string LogPath = Path.Combine( Environment.GetFolderPath(Environment.SpecialFolder.Desktop), "application_log.txt" ); // 详细日志 - 仅在Debug模式下记录 [Conditional( "DEBUG" )] public static void Debug ( string message) { WriteToLog($ "[DEBUG] {DateTime.Now}: {message}" ); Console.ForegroundColor = ConsoleColor.Gray; Console.WriteLine($ "调试: {message}" ); Console.ResetColor(); } // 信息日志 - 所有模式下都记录 public static void Info ( string message) { WriteToLog($ "[INFO] {DateTime.Now}: {message}" ); Console.ForegroundColor = ConsoleColor.Green; Console.WriteLine($ "信息: {message}" ); Console.ResetColor(); } // 警告日志 - 所有模式下都记录 public static void Warning ( string message) { WriteToLog($ "[WARN] {DateTime.Now}: {message}" ); Console.ForegroundColor = ConsoleColor.Yellow; Console.WriteLine($ "警告: {message}" ); Console.ResetColor(); } // 错误日志 - 所有模式下都记录 public static void Error ( string message, Exception ex = null) { string logMessage = $ "[ERROR] {DateTime.Now}: {message}" ; if (ex != null) { # if DEBUG // Debug模式下记录完整异常信息 logMessage += $ "\nException: {ex.Message}\nStackTrace: {ex.StackTrace}" ; # else // Release模式下只记录基本异常信息 logMessage += $ "\nException: {ex.Message}" ; # endif } WriteToLog(logMessage); Console.ForegroundColor = ConsoleColor.Red; Console.WriteLine($ "错误: {message}" ); Console.ResetColor(); } private static void WriteToLog ( string message) { try { File.AppendAllText(LogPath, message + Environment.NewLine); } catch { // 日志写入失败时的静默处理 } } } class Program { static void Main ( string [] args) { Logger.Info( "应用程序启动" ); Logger.Debug( "初始化配置..." ); try { int z = 0 ; int result = 10 / z; // 故意引发异常 } catch (Exception ex) { Logger.Error( "计算过程中发生错误" , ex); } Logger.Warning( "系统资源不足,部分功能可能受限" ); Logger.Info( "应用程序正常运行中" ); Console.ReadKey(); } } }
代码说明:
通过 [Conditional("DEBUG")] 修饰Debug日志方法,确保在Release版本中不会调用 在错误日志中,根据构建模式决定记录的异常详细程度 这种日志系统可以确保Release版本不会泄露过多的内部信息 如何在Visual Studio中切换构建模式 通过工具栏切换 在Visual Studio顶部的工具栏中找到"解决方案配置"下拉菜单 选择"Debug"或"Release" 点击"构建(Build) > 构建解决方案(Build Solution)"或按快捷键 Ctrl+Shift+B 重新编译项目 通过项目属性设置 在解决方案资源管理器中右键点击项目 选择"属性(Properties)" 切换到"生成(Build)"选项卡 在"配置(Configuration)"下拉菜单中选择"Debug"或"Release" 在此界面中可以设置条件编译符号、优化选项等高级设置 总结 Debug与Release模式的使用建议
开发效率提升技巧 合理使用条件编译 建立健全的日志系统 优化构建过程 定期在Release模式下测试 利用编译器指令 熟练使用 #if 、 #elif 、 #else 和 #endif 等预处理指令 自定义构建配置 根据项目需求创建Custom、Staging等特定构建配置 通过深入理解C#的Debug和Release构建模式,开发者可以更好地平衡开发效率与应用性能,编写出高质量的.NET应用程序。希望本文的详细示例和解析能帮助您在实际项目中更好地应用这些概念。
关键词 C#, Debug模式, Release模式, 条件编译, 性能优化, Visual Studio, 断言, 日志记录, 代码优化, .NET开发, 预处理指令, Conditional特性, 构建配置。
阅读原文:https://mp.weixin.qq.com/s/KcMEonxIMddcLCCVrb7eIg


 400 186 1886